

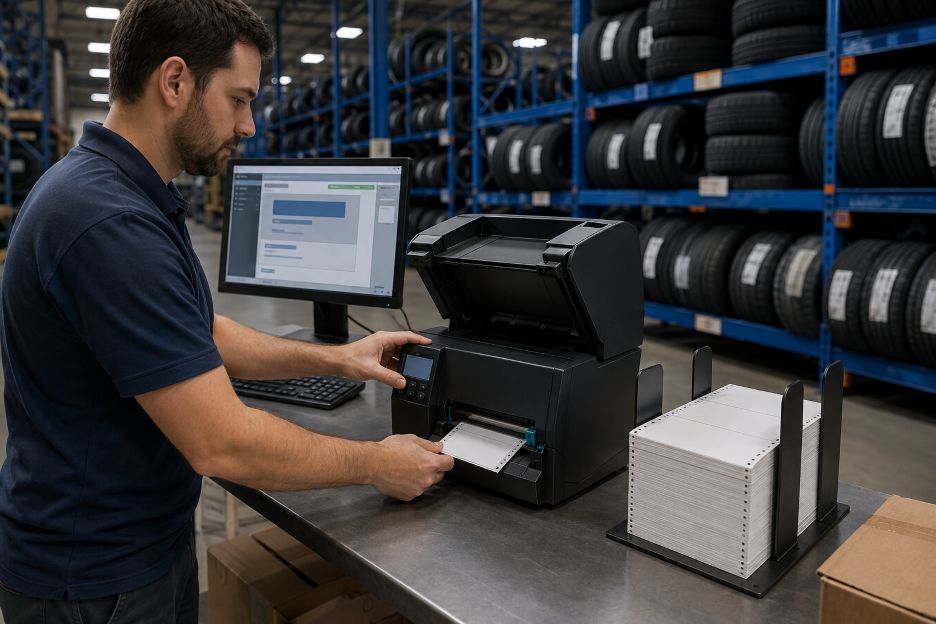
Direct thermal printers produce images by applying heat to chemically treated media, so they do not require an ink ribbon. This makes them practical for high-volume shipping stations where ribbon replacement can interrupt packing, but consistent output still depends on matching the printer, media, driver, and shipping software settings.
Fanfolded stock such as Durafast 4×6 Tire Shipping Labels can supply labels continuously from a stack behind the printer. The approach suits fulfillment teams handling tires and other bulky goods because staff can replenish media without fitting a roll or installing ribbon. Correct configuration is essential, however, since a mismatch can divide one label across two sheets or leave part of the carrier data unprinted.
Step 1: Confirm Printer and Media Compatibility
Start by checking that the printer supports direct thermal operation, fanfolded media, and a four-inch print width. Some thermal-transfer models can also print direct thermal labels, but their printing method must be changed accordingly. The Zebra Technologies ZT411 and ZT421 User Guide notes that a printer configured for direct thermal media may wait for ribbon when its printing method remains set to thermal transfer.
Review the printer manual before loading stock because media paths differ by model. Check the label width, length, gap type, and sensing method supported by the device. A gap-sensing printer must be able to identify the spaces between individual 4×6 labels so that each new print begins at the correct position.
Step 2: Position the Fanfold Stack Correctly
Place the label stack behind the printer on a clean, level surface. Align it with the rear media slot and allow enough space for the sheets to unfold without rubbing against a wall, cable, or carton. Labels should feed in a straight line rather than entering the printer at an angle.
Instructions published by Zebra Technologies direct users to insert fanfold media through the rear slot, position it between the media guides, and close the cover. The guides should hold the liner steadily without squeezing it. If the stock shifts sideways or develops frayed edges, the guide position needs further adjustment.
Step 3: Set the Printer for Direct Thermal Output
Open the printer properties through the operating system or the manufacturer’s setup utility. Select direct thermal as the print method, then set the media dimensions to 4 inches wide by 6 inches long. Choose gap or web sensing when the labels are separated by gaps, and leave ribbon-related options disabled.
Run the printer’s media-calibration procedure after changing the media type or size. Calibration allows the device to identify label boundaries and establish the correct resting position. Feed several blank labels afterward. Each sheet should stop consistently at the tear edge without creeping forward or stopping midway through the next label.
Step 4: Configure FedEx Ship Manager
Open FedEx Ship Manager Software and select the label-printer configuration area. The FedEx Ship Manager Software Installation and User Guide instructs users to open the Setup menu, choose Label Printer Selection, and assign the required thermal label type and printer under the domestic, international, and return settings.
Select a 4×6 thermal format without a document tab when using standard six-inch stock. Confirm that the selected printer is the direct thermal unit rather than an office laser printer or PDF device. Recurring configuration errors across different workstations may be among the signs that a business needs dedicated software or a more standardized shipping workflow. If several computers generate shipments, repeat and document the configuration on each one because local printer assignments may vary.
Step 5: Prevent Scaling and Format Conflicts
Printer properties and shipping software must agree on the page dimensions. Set output to actual size or 100 percent wherever a scaling control appears. Options such as “fit to page” can reduce the label, alter margins, or change the position of barcodes and routing information.
The FedEx Printer Support Guide explains that an incorrect label format may cause incomplete printing or output across two labels. It identifies Format 435 as a 4×6 thermal label without a document tab, although available format names can differ among FedEx software versions and regional installations.
Step 6: Test and Validate the Finished Label
Create a test shipment according to your organization’s normal procedure, then inspect the physical output before releasing a batch. Verify the following points:
- The entire label fits on one sheet.
- Barcodes, addresses, and routing details are fully printed.
- There is no clipping along any edge.
- The next label stops at a repeatable starting position.
- The barcode can be read by the scanning equipment used in the workflow.
If the image moves gradually between labels, recalibrate the media sensor and check the guides. If every label has the same horizontal or vertical offset, adjust the printer’s position settings in small increments rather than changing the FedEx-generated design. Faint areas may indicate contamination on the printhead. FedEx recommends cleaning residue from a thermal printhead when labels fail to print clearly.
Maintain a Repeatable Configuration
Record the approved driver, label format, print method, media setting, and alignment values for each workstation. Reprint a test label after driver updates, printer replacement, or software changes. A short validation routine helps high-volume teams preserve consistent 4×6 output while benefiting from fanfolded direct thermal stock and fewer consumable changes.